Pressure Reducing
Pressure Sustaining / Pressure Relief
Flow Control valves
Float Valves - Level Control
Electrically Actuated Valves
Pressure Modulation - Remote Control
Altitude Valves - Level Control
Burst Control Valves
Pump Control
CLA-VAL "HYTROL" Main Valve
Valve Controllers and Data Loggers
Air Valves
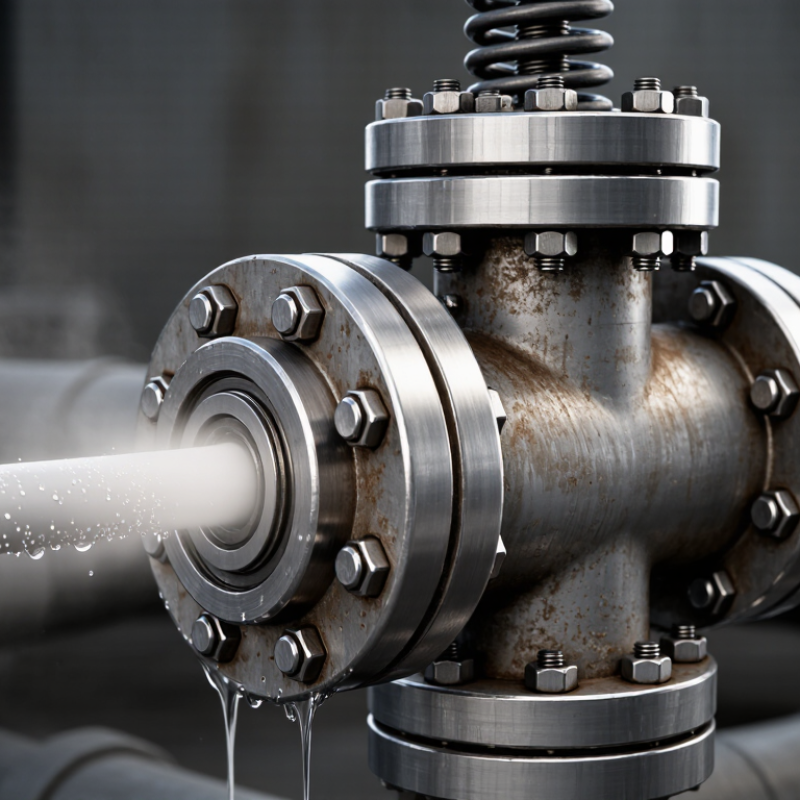
A Pressure Release Valve should remain sealed during normal operation, yet a small discharge can signal a developing problem. The cause is not always a worn valve. Dirt or scale may lodge between the disc and seat, leaving a thin path for steam, air, or liquid. A damaged seat, corrosion, vibration, or incorrect installation can also prevent tight closure. Sometimes the valve is simply operating too close to its set pressure.
Pressure-systems specialist Maya Chen offers a useful diagnostic reminder: “A leak is a symptom, not a diagnosis.” Treat that as a guiding principle, not a substitute for equipment-specific advice. Note when the leak occurs, what fluid escapes, and whether pressure or temperature changes at the same time. A faint hiss at a threaded outlet differs from a steady stream at the discharge pipe. Small details matter.
The next sections examine common causes, safe inspection steps, and when professional servicing is appropriate. Never assume that tightening a fitting will solve the problem; it may hide a more serious fault. Follow the equipment manufacturer’s instructions and site procedures, and have qualified personnel assess a valve that continues to leak. Diagnosis can be messy. A clean-looking valve may still have a damaged seat, while residue around the outlet may come from an earlier release. That uncertainty deserves attention.
Why Does a Pressure Release Valve Leak?
How a Pressure-Relief Valve Seals—and What Counts as Leakage
A pressure-relief valve stays closed when spring force presses its disc against the seat. When system pressure reaches the set point, pressure lifts the disc and fluid exits through the outlet. As pressure falls, the spring returns the disc to its seat. A brief discharge during a pressure event may be expected. That is normal. Persistent flow after pressure settles is different. Even a thin, steady stream can signal poor sealing.
The leak’s location matters. Fluid at the outlet may point to debris, seat wear, corrosion, or repeated opening from unstable pressure. Leakage around body joints may indicate a connection or seal problem instead. It is tempting to blame the valve immediately, but upstream pressure, vibration, or installation can also contribute. Not always obvious. Record pressure readings and note whether leakage is continuous, pulsing, or occurs only after relief. Never block the outlet or alter the set pressure; ask a qualified technician to inspect the valve and system.
Tips: Check the outlet from a safe distance and compare observed pressure with the equipment’s specified range. Keep clear; hot steam or liquid can injure. A small drip is not automatically harmless. Document changes before service.
A relief valve is expected to seal while below its set pressure, begin opening at set pressure, and discharge when open. Leakage means unwanted flow past the seat while the valve is expected to be closed—not normal discharge during operation. Dirt, seat damage, misalignment, or unsuitable operating conditions can prevent proper sealing. Allowable seat leakage depends on the applicable standard and valve design; this chart shows operating states, not measured test data.
A pressure release valve can leak for several reasons, and a small leak does not automatically mean its set pressure is wrong. Under ASME Section VIII, the allowable set-pressure tolerance is commonly ±3% at 70 psi and above. At a 70 psi setting, that equals about 2.1 psi. At 100 psi, it equals 3 psi.
This tolerance applies to the valve’s measured set pressure during testing. It is not permission for continuous leakage, nor does it define how much fluid may escape from the seat. Easy to misread. A valve may begin to simmer near its set point, while a damaged seat, debris, vibration, or changing backpressure can also cause leakage. The distinction matters.
For a meaningful check, record the pressure gauge reading, operating temperature, and when the leak occurs. Compare test results with the applicable code edition and the valve’s service conditions; details can vary. A qualified technician can inspect the seat and verify calibration using suitable equipment. A barely visible drip may seem minor, but pressure fluctuations can make it worse. Don’t guess from sound alone.
A pressure release valve may leak because its sealing surfaces no longer meet cleanly. Debris is a common culprit: rust flakes, scale, or pipe residue can lodge between the disc and seat. Even a grain of grit can hold the valve slightly open. The result may be a fine spray, a steady drip, or a faint hiss near the outlet. A damaged seat creates a similar path. Corrosion, repeated contact, or a previous discharge can leave pits and scratches that prevent a tight seal. A tiny flaw matters.
Backpressure can also affect how a valve opens and reseats, especially when downstream piping adds pressure the valve was not designed to handle. The effect depends on valve design and installation, so check the equipment documentation rather than assuming one cause. Wear adds another possibility: a weakened spring, loose parts, or repeated cycling may shift the set pressure or reduce reliable closure. If leakage begins after a discharge, contamination or seat damage may be involved; if it persists, inspection is warranted. A visual check helps, but it cannot confirm internal condition. Never plug or clamp a leaking outlet. Have a qualified technician assess the valve and connected system, following site procedures.
A pressure-relief valve may leak because debris, damaged seating surfaces, or misalignment prevents tight closure. But a visible discharge does not automatically prove a failed seat; operating pressure and test conditions matter. API Standard 527, Seat Tightness of Pressure Relief Valves, defines procedures for checking seat leakage under controlled conditions. For metal seats, its allowable bubble rate depends on orifice size: up to 40 bubbles per minute for a D orifice and 100 for an F orifice. These are acceptance limits, not proof that every valve will perform the same in service.
API 527 testing uses specified media and pressures, with leakage assessed consistently rather than by a quick glance. A valve that passes the test may still leak later if particles reach the seat or operating conditions change. The count matters. So does test setup. It is easy to blame the valve; that is not always right. Check whether the reported leak comes through the seat or from an external connection before deciding what to inspect.
Tips: Record the test medium, pressure, orifice size, and bubble count. Keep the outlet clean and watch for bubbles steadily, not just briefly. If results are near the allowable limit, repeat the test and review the setup. Small details matter.
A pressure release valve may drip because system pressure is reaching the valve’s set point. Pressure spikes can happen during heating, pump cycling, or sudden flow changes. Check the pressure gauge while the system is operating, and compare its reading with the valve’s rated setting. A faulty or poorly calibrated gauge can mislead you. That detail matters. Do not adjust the valve just to stop the leak.
Look closely at where the water or fluid appears. A leak at the threaded connection may point to a damaged seal or installation problem; fluid from the discharge outlet suggests the valve may be opening. Confirm that the valve is installed in the position specified for that model, with discharge piping properly supported and unobstructed. A pipe pressing sideways on the valve can strain the connection. Never cap or block the outlet.
If pressure stays within the expected range, inspect for corrosion, mineral deposits, or wear around the outlet. Chalky residue and repeated dripping may indicate debris on the sealing surface, but appearance alone cannot confirm the cause. I have seen a small drip blamed on a worn valve when pressure was the real issue. That can be frustrating. Before removing or servicing anything, isolate and fully depressurize the system according to its instructions; have a qualified technician assess it if the cause remains unclear.
| Leak Pattern | Possible Cause | What to Check | Appropriate Next Step | Safety Priority |
|---|---|---|---|---|
| Discharge continues while system pressure is at or above the valve’s marked set pressure | The valve may be opening as designed because of excessive operating pressure, a pressure-control problem, or a system upset. | Use a suitable, calibrated gauge to compare actual pressure with the valve nameplate and equipment specifications. Check for a faulty regulator, pump control, or blocked pressure-control path. | Have a qualified technician identify and correct the source of overpressure. Do not raise the valve’s set pressure to stop the discharge. | High. Treat unexplained or rising pressure as a potentially hazardous condition. |
| Small, persistent leak from the outlet when pressure is below the marked set pressure | Dirt, scale, corrosion, or seat damage may prevent the valve from sealing. The valve may also be worn or unsuitable for the service. | Confirm pressure with a reliable gauge and inspect the outlet and valve for deposits, corrosion, or visible damage. Do not dismantle a pressurized valve. | Isolate and depressurize the system using the approved procedure. Arrange inspection, cleaning, repair, or replacement by a qualified person, following the valve manufacturer’s instructions. | High. Never plug, cap, or obstruct the discharge outlet. |
| Leak appears after pressure fluctuates or the valve opens and closes repeatedly | Pressure may be operating close to the set point, or the system may have unstable pressure, inadequate capacity, or rapid pressure surges. | Record operating pressure over time and check for pump cycling, regulator instability, pressure spikes, or process changes. | Correct the system pressure-control issue and confirm that the valve is correctly selected for the application. Do not alter the set point without an approved engineering review. | High if pressure is unstable, exceeds equipment limits, or the valve repeatedly discharges. |
| Leak occurs mainly after a liquid-filled section is heated | Thermal expansion in a trapped, liquid-filled section can raise pressure even when the main system pressure seems normal. | Check whether isolation valves can trap liquid between them and whether pressure rises as the section warms. | Ask a qualified designer or technician to assess the system and provide an appropriate thermal-expansion protection method. | High. Do not rely on manually opening a relief valve as routine pressure control. |
| Fluid leaks around the valve body, cover, or connection rather than from the outlet | A loose or damaged connection, failed gasket, corrosion, cracking, or other body damage may be present. | Identify the exact leak location from a safe distance. Look for corrosion, deformation, or damage; check installation records and the specified connection requirements. | Depressurize and isolate the equipment before any work. Have a qualified person repair or replace the affected parts and verify the installation. | High. Do not tighten or repair a pressurized valve or connection. |
| Leak or discharge changes after installation or maintenance | The valve may be incorrectly oriented, exposed to excessive pipe strain, installed with unsuitable fittings, or connected to a restricted discharge line. | Compare the installation with the valve instructions and system design. Check orientation requirements, support, inlet piping, and whether the discharge path is unobstructed and safely routed. | Have a qualified installer correct any discrepancy. Keep the discharge path open and route it as required by applicable codes and the equipment instructions. | High. A restricted or unsafe discharge path can prevent safe pressure relief. |
| Occasional discharge during a known pressure event, followed by continued seepage | After opening, debris or seat damage may prevent the valve from resealing; alternatively, pressure may remain too close to the set point. | Check current pressure and determine whether the event exceeded the set point. Inspect for recurring pressure surges and signs of contamination. | Find and correct the cause of the pressure event. Have the valve inspected and tested according to its service requirements. | High. Continued leakage should not be assumed harmless. |
| General guidance: A pressure relief valve is a safety device. Do not block its outlet, adjust its set pressure, or dismantle it while the system is pressurized. Follow the equipment documentation, applicable codes, and qualified service procedures. If the pressure is unknown, rising, or above the equipment rating, keep clear and contact qualified service personnel. | ||||
CLA-VAL UK Limited
Dainton House
Goods Station Road
Tunbridge Wells
Kent, TN1 2DR
© 2025 CLA-VAL UK | site map | Terms and Conditions of Sale and Warranty | Privacy policy